


![JSAUX anti-glare matte screen protector for ROG Ally and ROG Xbox Ally series #style_[2-pack] for all rog ally models](http://jsaux.com/cdn/shop/files/GP0113A-Anti-Glare-Screen-Protector-for-ROG-Ally-_-ROG-Xbox-Ally-Series-1_jpg.png?v=1762310072&width=92)


![Grey 2-pack 90 degree USB-C to USB-C right angle adapters #style_grey [2-pack]](http://jsaux.com/cdn/shop/files/90_-USB-C-to-USB-C-Right-Angle-Adapter-grey-1.png?v=1755238920&width=92)


Navigation
10. Remove Trigger
12. Remove Joystick
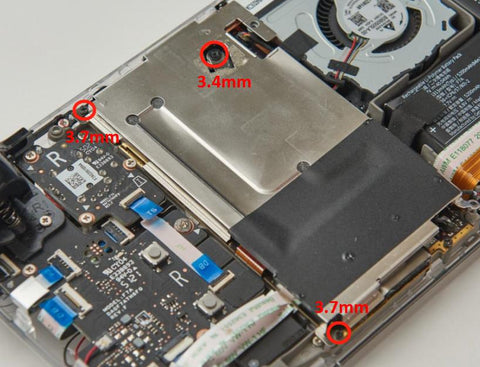
18. Remove Screen
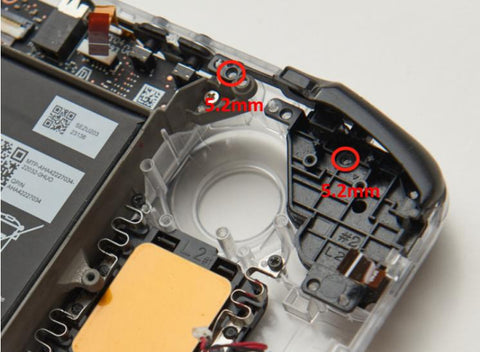
20. Remove Speaker
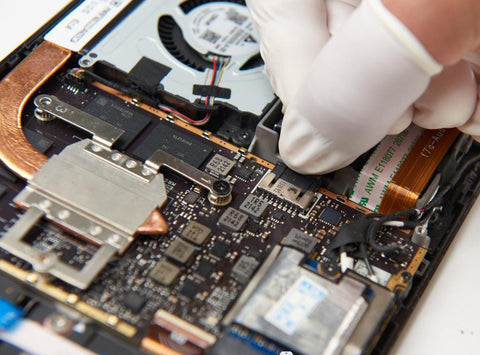
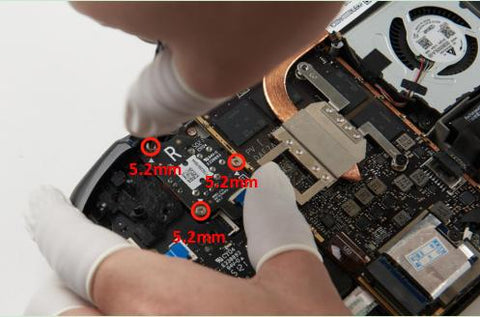
22. Remove Trackpad
1. Check PC0108
20. Try to Boot
Transparent Front Cover PC0108 Installation Tutorial

PC0108 インストールチュートリアル
ご質問がありますか? 「 インストールに関するFAQ 」をご覧ください。
- 予防
カバーの交換は難しく時間のかかる作業であり、3~5時間かかると見込まれます。専門の修理業者にご依頼いただくことを強くお勧めします。分解に伴う機械全体のメンテナンスポリシーの変更については、VALVEが公式に発表した情報をご参照ください。
追加の予防措置として、Valveは内部修理を始める前に、BIOSに入り、Steamデッキをバッテリーストレージモードにすることを推奨しています。Micro SDカードを装着している場合は、分解前に取り外してください。
分解を始める前に、Steam Deckのバッテリー残量が25%未満であること、電源が完全にオフになっていること、接続されているすべてのケーブルが取り外されていることを確認してください。操作中は静電気防止に関する安全規則を遵守し、取り外した元の付属品は適切に保管してください。通電中のリチウムイオンバッテリーを誤って損傷すると、深刻な危険につながる可能性がありますのでご注意ください。
修理の際は、Steamデッキの損傷を防ぐため、ネジを正しく締め直してください。取り付けの際は、「L」ロゴが右側、「R」ロゴが左側になるように取り付けてください。取り付けミスを防ぐことができます。
ビデオチュートリアルとこのドキュメントの順序は若干異なる場合がありますのでご注意ください。ビデオチュートリアルとこのドキュメントでは、デバイスの取り外しと取り付けを確実に行うための2つの分解手順が示されています。実際の状況に応じて、どちらかの手順をお選びください。
- 分解手順


18. スクリーンを取り外す


- インストール手順


取り付け後はカバーを取り外さないでください。

15. Steamキーとクイックアクセスキーをインストールする


16. タッチパッドMCBの取り付け


- ボードのキャリブレーション