


![Grey 2-pack 90 degree USB-C to USB-C right angle adapters #style_grey [2-pack]](http://jsaux.com/cdn/shop/files/90_-USB-C-to-USB-C-Right-Angle-Adapter-grey-1.png?v=1755238920&width=92)


![JSAUX anti-glare matte screen protector for ROG Ally and ROG Xbox Ally series #style_[2-pack] for all rog ally models](http://jsaux.com/cdn/shop/files/GP0113A-Anti-Glare-Screen-Protector-for-ROG-Ally-_-ROG-Xbox-Ally-Series-1_jpg.png?v=1762310072&width=92)


![JSAUX anti-glare screen protector 2-pack for Lenovo Legion Go 2 with alignment frame #model_for legion go 2 [2-pack]](http://jsaux.com/cdn/shop/files/GP0132-Anti-Glare-Screen-Protector-for-Legion-Go-2-1.png?v=1766136633&width=92)


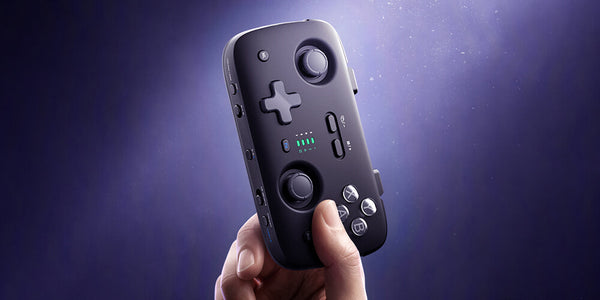
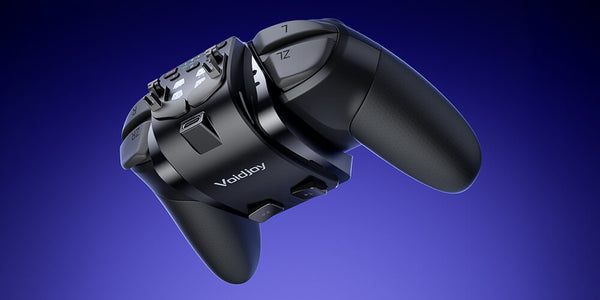
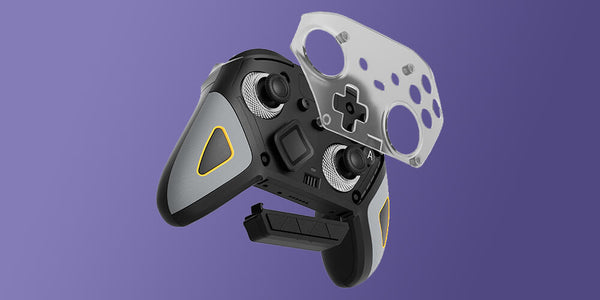
VOIDJOY SkyLark S1 Pro Portable Controller
Operation Guide
Operation Video
*Video note:This video may show a pre-production sample. The final retail product may vary in color, finish, or packaging, but the operating workflow remains the same.
Product Overview


Quick Start
1. Connection Method
The S1 Pro supports three connection methods. Choose the method that best matches your host device and gaming setup.
- Bluetooth Connection
- Set the controller’s mode switch to Bluetooth.
- Press the Mode button to select the required Bluetooth mode.
- Press and hold the Bluetooth pairing button to enter pairing mode.
- Open the Bluetooth settings on your host device.
- Select the corresponding controller name to complete pairing.
Bluetooth Mode:
- X mode: Connects by Bluetooth to computers, Android devices, iOS devices, and other devices as an Xbox-style Controller.
- D mode: Connects by Bluetooth to various devices as a general Controller (Dinput protocol).
- S mode: Connects by Bluetooth to Switch/Switch Lite/Switch 2 asPro Controller.
- T mode: Connects by Bluetooth to Android devices in touchscreen mapping mode (virtual touch mode).
- 2.4GHz Wireless Connection
- Plug the included 2.4GHz receiver into your host device.
- Set the controller’s mode switch to 2.4GHz.
- Turn on the controller.
- The controller will automatically connect to the receiver.
- If pairing is required, press and hold the controller’s pairing button while the controller is in 2.4GHz mode.
For mobile devices or tablets that do not have a standard USB-A port, a compatible USB-C or OTG adapter may be required.
*Download and install the latest 2.4GHz receiver firmware.
Download the corresponding firmware, connect the 2.4G receiver to your computer via USB, open the firmware update tool, and click Upgrade. Wait for the process to complete.
- USB-C Wired Connection
- Make sure the controller is switched off.
- Connect the controller to the host device using the included USB-C cable.
- The controller will automatically identify a compatible wired mode.
- If a specific mode is required, hold the corresponding face button while connecting the USB cable.
USB mode is recommended for low-interference environments, high polling-rate gameplay and charging-free wired use.
2. Charging & Remaining Battery Check
The rechargeable battery installed in the Controller is not fully charged at first.
- Charge it before use:
Connect thecontroller toa computer game console, USB chargeror power bank usinga USB to Type-C charging & data cable. - During Charging:
While charging, the indicators flash from empty to full.
( Red indicator lights turn on ;the last battery level indicator flashes.) - Charging Complete:
When charging is finished, all four red indicator lights stay steadily lit. - Remaining Battery Check:
During Controller use, press [Fn] and [MODE] to display the remaining battery power. The built-in battery level is shown for about 3 seconds in the following four states. Indicator LED Indicator LED Status.
*When the target battery level is below 10%, the current mode indicator for Bluetooth 1/Bluetooth 2/2.4G flashes as a warning.

3. Linear Trigger & Quick Trigger Switching
Linear Trigger function ON (long travel):Slide the lock switch next to the LT/RT triggers toward the Type-C port. The triggers provide approximately 4 mm of travel for precise analog control.
Linear Trigger function OFF (short travel):Slide the lock switch back toward you. The triggers provide approximately 2 mm of short travel for faster actuation.
*Linear Trigger functionality may not be available in every connection mode or game. Do not force the LT/RT buttons while switching trigger modes. 
4. Pair with a Switch/Switch 2
- Pairing with the Switch :Pairing is required the first time the Controller connects to a Switch console.
Connect the included Type-C data cable to the Switch dock. The Controller automatically recognizes the connected device and uses Pro Controller wired mode. At the same time, Bluetooth Pairing information for the Controller and Switch console is saved automatically. After the wired connection is disconnected, the Controller can switch to Bluetooth wireless mode and automatically connect to the Switch.
- Pairing with Switch 2:This Controller supports a special method for copying Switch 2 Joy-Con wake information to enable the Switch 2 console wake function. Pairing is required the first time it connects to a Switch 2.
- Open the Switch 2 Controller search screen.
- Power on the Controller in Bluetooth mode on the D1 channel, then switch to S mode. Press and hold the Bluetooth Pairing button until the dark blue indicator flashes quickly to begin Pairing.
- After the Controller shows that connection is complete, remove the second-generation Joy Con from the console within 20 seconds. Wake information will be copied automatically, and you can then try waking the Switch 2 console. If wake fails, go to "Settings" - "Controllers & Accessories" - "Disconnect Controllers" on the Switch 2 console to disconnect all connected Controllers, then repeat the steps above.
* Note: Switch 2 wake setup is supported only on Bluetooth channel D1.
Two-Controller Role Switching
1. What does the feature do?
When two S1 Pro controllers are connected to the same 2.4GHz receiver, the host device still recognizes them as two independent controllers:
- Gamepad 1
- Gamepad 2
The controllers are not combined into a single input.
During local co-op gameplay, either player can swap the two player assignments. This allows a parent, friend or more experienced player to temporarily take over the other player’s role without physically exchanging controllers.
2. Requirements
You will need:
- Two VOIDJOY SkyLark S1 Pro controllers
- One included 2.4GHz receiver
- A compatible host device
- A local multiplayer game
Both controllers must be set to 2.4GHz modeand paired with thesame 2.4GHz receiver.
*Download and install the latest 2.4GHz receiver firmware.
Download the corresponding firmware, connect the 2.4G receiver to your computer via USB, open the firmware update tool, and click Upgrade. Wait for the process to complete.
3. Setup
- Plug one S1 Pro 2.4GHz receiver into the host device.
- Set the first S1 Pro to 2.4GHz mode and turn it on.
- Pair the first controller with the receiver if required.
- Set the second S1 Pro to 2.4GHz mode and turn it on.
- Pair the second controller with the same receiver.
- Start a local co-op game.
- Confirm that both controllers are recognized as separate gamepads.
4. Swap Player Assignments
During gameplay:
Press Fn + the Pop-up Menu button marked “1P ↔ 2P” on either controller.
This swaps the Player 1 and Player 2 assignments.
Press the same shortcut again to switch the assignments back.
The switch can be performed without:
- Pausing the game
- Disconnecting the controllers
- Pairing the controllers again
- Physically exchanging the controllers
5. Important Notes
- The feature exchanges the two player assignments; it does not merge two controllers into one player input.
- Two controllers can also share one receiver during ordinary local multiplayer without using role switching.
- Bluetooth mode does not support two-controller role switching.
- Each S1 Pro includes its own 2.4GHz receiver.
- When two controllers share one receiver, the second receiver is not required.
- Do not connect the second receiver at the same time, as it may interfere with pairing.
- Two controllers can control the same character only when the game itself natively supports shared control.
Basic Operation
1. TURBO Settings (Rapid Fire / Auto Rapid Fire):
- Rapid fire: Press Fn + a function button to start.
- Auto rapid fire: Press Fn + the same function button twice to start.
- Rapid-fire speed: Press Fn + right joystick up/down to adjust the global rapid-fire speed.
- Three levels are available: slow, medium, and fast. To cancel rapid fire, double-press Fn to cancel rapid fire for all buttons.

2. Recording Macros with the ML/MR Expansion Buttons:
- Recording: Press Fn + ML/MR to start macro recording. The indicator for the current mode turns red, indicating that macro recording is ready.
- Saving a macro:After entering the button sequence, press ML/MR again to save it. The red indicator turns off.
- Clearing a macro: Hold Fn and press ML/MR twice to clear it. (This saves an empty macro.)
*Macro recording supports recording up to 42 button-sequence entries, including joystick and button timing.
3. Mapping Buttons with the ML/MR Expansion Buttons:
When only one button is recorded to an expansion button, the expansion button functions as a mapped button.
*To change mapping for the Controller body function buttons, use the mapping menu page in the app.
4. Using the ML/MR Expansion Buttons for Forced Motion Control (Replacing the Right Joystick):
When only the [ the Pop-up Menu button marked “1P ↔ 2P”] button is recorded to an expansion button, that expansion button becomes the Motion Control activation button (the gyroscope replaces the right joystick).
- If one [ the Pop-up Menu button marked “1P ↔ 2P”] button is recorded, hold the expansion button to enable Motion Control; release it to disable the function.
- If two [ the Pop-up Menu button marked “1P ↔ 2P”] buttons are recorded, press the expansion button once to enable Motion Control, then press it again to disable Motion Control.
*In Switch mode, the [Screenshot] button is mapped as the screenshot/video capture button and does not function as a Motion Control switch. When 2 or more buttons other than this button are recorded, they are saved as a button sequence (macro setting).
5. Exchanging Control Authority When Using Two Controllers (Role Control Exchange):
Conditions for role control exchange between two Controllers:Use 2.4G mode with two Controllers connected to one 2.4G Receiver at the same time.
Conditions for role control exchange between two Controllers:
1. Insert the 2.4G Receiver into the game console(PC/Android device /Switch/PlayStation 3)
2. Set the first Controller slide switch to the 2.4G position and turn it on. If Pairing is required, press and
hold the Bluetooth Pairing button to pair. Connect the second Controller in the same way.
*Do not use the Receiver for another Controller of the same model during Pairing with the Receiver.
3. During a game, press Fn + [the Pop-up Menu button marked “1P ↔ 2P”] to exchange operating authority between the two Controllers.
6. Switch/PlayStation 3 Connection Channel Number Indicator:
After the Controller is connected to a Switch/PS3 console, a channel number is assigned automatically according to the device connection order, and the mode indicator changes to the corresponding color channel-number indicator. 
KeyLinker App
The KeyLinker App provides advanced controller customization.
You can use it to adjust:
- Button mapping
- Stick sensitivity and dead zones
- Trigger sensitivity
- Vibration intensity
- Macro settings
- Turbo settings
- Lighting effects
- Firmware updates
- Controller testing
The controller can remain connected to the gaming device while configuration settings are adjusted through the app.
Download KeyLinker
Switch 2 Wake Support
The S1 Pro supports remote wake for Nintendo Switch 2 through its dedicated Bluetooth wake mode.
Wake support is available in:
- Handheld mode
- Docked / TV mode
Remote wake is not supported through the 2.4GHz receiver or USB connection because the console’s USB ports are not powered while it is asleep.
Compatibility
The S1 Pro is designed to work with supported devices and platforms including:
- Nintendo Switch
- Nintendo Switch 2
- Windows PC
- macOS
- Android devices
- iPhone and iPad
- Compatible smart TVs
- PlayStation 3
The controller supports XInput on compatible PCs and mobile devices, but it is not compatible with Xbox consoles or PlayStation 5 consoles.
Available functions may vary depending on the host device, operating system, connection mode and game.
Full User Manual
For detailed button combinations, mode indicators, troubleshooting and safety information: [Download the Full User Manual]
VOIDJOY Elite Extender for Switch Pro Controller
Operation Guide
Operation Video
Product Overview
1.Button Layouts


2.Install and Remove the ExtendPack
-
Install the ExtendPack

-
Remove the ExtendPack

3.Install and Remove the Magnetic Triggers
-
Install the Magnetic Triggers


-
Remove the Magnetic Triggers


Quick Start
1. Charging & Remaining Battery Check
- During Charging:
While charging, the indicators flash from empty to full.
( Red indicator lights turn on ;the last battery level indicator flashes.) - Charging Complete:
When charging is finished, all four red indicator lights stay steadily lit.
- Remaining Battery Check:
While in use, press [Fn] and [MODE] to display the remaining battery power. The built-in battery level is shown for about 3 seconds in the following four states. Indicator LED Indicator LED Status.

2. Bluetooth Connection
When the orange mode indicator flashes slowly, the extender is attempting to reconnect. Press and hold the mode button to cycle through connection modes.
Select the required mode, then press and hold the Bluetooth pairing button. Release the button when the orange indicator flashes quickly.
Open the Bluetooth settings on the target device and select the broadcast name for the required mode.
Basic Operation
1. Mode Selection
During startup reconnection or normal operation, press and hold the mode button to switch modes.
[S]:Switch Console / Pro Controller mode for PC
[X]:Xinput mode for PC / iPad / iPhone / Android ( phone/tv )
[D]:Dinput mode for PC / Android ( tv ) / Raspberry Pi
[T]:Virtual touch mode for Android
2. TURBO Settings
- TURBO: Press Fn together with a supported controller button to enable rapid fire.
- Auto TURBO: Press Fn together with the same controller button twice to enable automatic rapid fire.
- Supported buttons include A, B, X, Y, L, R, ZL, ZR, LS, RS, - and +.
3. Macro Recording with LT, RT, P1 and P2
- Recording:Press Fn + LT/RT/P1/P2 to start recording a macro. The indicator for the selected expansion button turns red.
- Saving a macro:After entering the button sequence, press LT/RT/P1/P2 again to save it. The red indicator turns off.
- Clearing a macro: Hold Fn and press LT/RT/P1/P2 twice to clear it. (This saves an empty macro.)
4. Mapping buttons with LT/RT and P1/P2
When only one button is recorded to an expansion button, the expansion button functions as a mapped button.
*To change mapping for the Controller body function buttons, use the mapping menu page in the app.The [X] mode LT/RT key mapping is only stored temporarily and will revert to the linear trigger function when the power is turned off and on again.
5.Forced Motion sensing with extended LT/RT and P1/P2 (instead of right stick)
- If one [Screenshot] button is recorded, hold the expansion button to enable Motion Control; release it to disable the function.
- If two [Screenshot] buttons are recorded, press the expansion button once to enable Motion Control, then press it again to disable Motion Control.
*In Switch mode, the [Screenshot] button is mapped as the screenshot/video capture button and does not function as a Motion Control switch. When 2 or more buttons other than this button are recorded, they are saved as a button sequence (macro setting)
6.Switch Controller Player number display

KeyLinker App
The KeyLinker App provides advanced controller customization.
You can use it to adjust:
- Button mapping
- Stick sensitivity and dead zones
- Trigger sensitivity
- Vibration intensity
- Macro settings
- Turbo settings
- Lighting effects
- Firmware updates
- Controller testing
The controller can remain connected to the gaming device while configuration settings are adjusted through the app.
Download KeyLinker
Full User Manual
For detailed button combinations, mode indicators, troubleshooting and safety information: [Download the Full User Manual]